
More than a few gifts this year to friends and family were gift cards and although they possessed monetary value, I felt the enjoyment of receiving a wrapped gift box was somehow lost. So after purchasing several two dollar gift boxes just to put gift cards in I came up with a packaging idea that would cost next to nothing.
Supplies:
- Recycled file folder or other cover weight paper from the recycle bin*
- X-acto™ Knife or Scissors
- White Glue
- 2 or 3 binder clips
- Ruler
- Printer
- Pencil
- Bone folder or butter knife
* I used a recycled folder in this tutorial, however any cover weight paper will work. Some suggestions are:
- light weight cardboard from boxes and packaging
- magazine covers
- old paper back book covers

- Download puffpillowtemplate.jpg and print it out full size (a scale has been placed on each jpg to help with printing at the correct proportions).

- Cut out the template for A. Puff Pillow Body and B. End Fold Template. Using template A, trace the outside of the puff pillow on the file folder or cover weight paper. Make sure to lightly mark the fold lines. Cut out the body of the puff pillow.

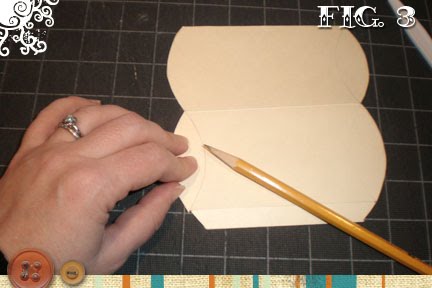
- Take template B and align it with one of the curved ends like you see in fig. 3. With a pencil lightly trace the fold line. Repeat this step on the remaining three rounded ends of the body.

- Figure 4A shows a map of all the fold lines, using a bone folder or the wrong side of a butter knife, score the FOLD lines.**


** Scoring a piece adds a notch to the paper that makes it easier to fold. Place the ruler on the fold line and take the bone folder and run it along the length of the fold. If you do not have a bone folder you can use the back side (the un-serrated edge) of a butter knife. Do not press too hard, you do not want to rip or tear the paper. - Using A. Puff Pillow Body as a guide, apply glue to the flap of the puff pillow on the outside. The flap will be folded on the inside of the puff pillow. Use binder clips to hold the end together until the area is thoroughly dry.
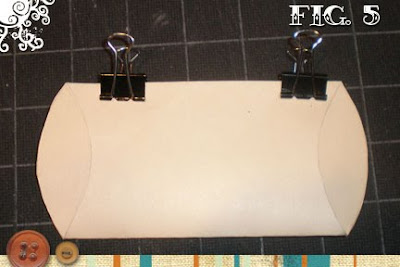
- To puff the pillow, take the ends and carefully work the scoring to fold them creating the pillow shape.


Optional decoration can be added by using scraps or pieces of recycled paper to spruce up the package. I used a scrap piece of wrapping paper, an old piece of sheet music and some raffia to add a little color and texture to my pillow. If you would like to use two pieces of paper like I did use the following measurements:
- 3.5” wide by 5.5” long for the outside piece
- 3” wide by 5.5” long for the inset piece
Thank you!
ReplyDeleteThis is a fantastic reusing blog that I think you might enjoy. Blah to Tada
ReplyDelete