
Flouncy Flower Headband How-to

While shopping in thrift stores fabric, not clothing style, is what usually catches my eye. Months ago I purchased a see through light blue shirt for 98 cents, brought it home, washed it and have restlessly moved it from room to room wondering why I purchased a translucent shirt that would fit in Molly Ringwald’s Pretty in Pink wardrobe. Not that I don’t like Pretty in Pink but at 37, I don’t think I can pull off the look. So after much thought and some inspiration from Anthropology I came up with an idea for a repurposed flower headband.

What you will need:
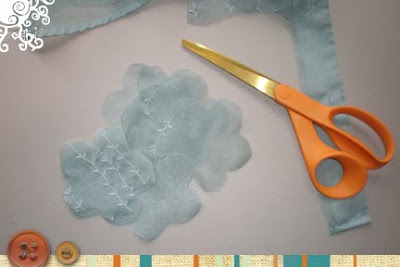
  • 1/8 yard of Flouncy Fabric (such as chiffon)
  • Sharp Scissors
  • Straight Pins
  • Sewing Needle
  • Thread
  • Medium to large sized button
  • Headband
  • Square of felt
  • Glue Gun


  1. Download the Flouncy Flower pattern by clicking here. Print pattern out at 100%.

  2. Cut 12 flower petals using the flower petal pattern from the fabric. HINT: Since the fabric is thin you can cut out several at a time by layering the fabric.

  3. Thread the needle using at least a foot of thread. Place needle close at hand for next step.
  4. Take a flower petal and fold it in half lengthwise (fig. 4A). Take the folded petal and fold it in half a second time (fig. 4B).


  5. Pick up the needle and thread and put a holding stitch at the bottom point of the folded petal (fig. 5).

  6. Repeat step four with a second flower petal.
  7. Stitch the second petal base to the first petal. HINT: I often run a second stitch through the petals to keep them in place, making it easier to attach the others (fig.7).

  8. Repeat steps six and seven. When stitching the remaining petals to the base attach them in a circular pattern around the original petal (fig. 8).

  9. After the last petal is attached knot off the thread to secure the petals in place and cut off the excess thread tale. The flower should look like fig. 9.

  10. Flatten out the flower and sew a button to the center of the flower (fig. 10).

  11. Cut out the a piece of felt using the backer pattern (fig. 11).

  12. Determine where you would like to place the flower on the headband. You can lightly mark this area with a wax pencil or sharpie if needed. Hot glue the flower to the backer MAKING SURE TO SANDWICH THE HEADBAND between the two.

  13. Now put on your headband and go out for a night on the town!

Comments

Post a Comment

Popular posts from this blog

Leather Earring Tutorial

Why should leather only be used for jackets, shoes and purses? Medium weight or upholstery leather is easy to craft since it doesn't fray or crinkle. These leather earrings are quick, versatile and easy to make. You can even recycle those old purses or jackets that have damage since you really only need small amounts of good leather. I used 4" square leather samples and had plenty left over to make more earrings. Supplies: Leather Leather punch (I bought mine at Michaels Craft store for around $10 but you can also get the from home stores like Home Depot or Lowes) Sharp scissors 2-Large Jump Rings 2-Earring wires Jewelry pliers Download the pattern below, print and cut out shapes. Cut 2-of each shape in the leather of your choice. I used 3 different types of leather, don't be afraid to mix it up. Pile one set of the three shapes on top of each other and carefully punch a whole on one of the ends. I punched the hole about a quarter of an inch away from the end using the sma...

Leather Earring Pattern Update

In October I posted a tutorial to make leather earrings . Well for Christmas I revisited this craft and made a few other designs for a few people at my work. This is one of my favorite tutorials because they are so easy to make and the earrings are light and easy to wear. I liked the new designs so much I thought I would share the pattern for them. To view the full set of instructions on how to make these leather earrings, click here . To make one of the two pairs shown, download and print the updated pattern below (the bottom row are the new designs):

Paper Towel Roll Flowers—Tutorial

Puppy puddle? Chips not strong enough to hold the salsa? Drippy pancake batter? I am constantly reaching for paper towels. Inevitably our recycling bin has it’s fair share of craft paper cylinders that make up the core of paper towels and toilet paper rolls. For years my idea of repurposing the tubes was to use them as an amplifier and howl in them, driving my dogs crazy and earning an eye roll from my husband. However, recently I was struck with an idea. The curve of the cardboard would lend itself well to making paper flowers, hence this tutorial was born. Sorry it is a little lengthy… Tools & Materials 1- paper towel roll core Scissors Button Paper glue Page of paper (can be recycled from an old book or magazine) Brown paper shopping bag 28 gauge wire (or wire that you can bend and manipulate that is heavy enough to hold up a paper flower) Wire cutters White craft paint (optional) Small paint brush (optional) Instructions Cut the paper towel roll lengthwise (fig. A). From the cu...