
Pretty Paper Pansies How-To


These pretty paper pansies are a cheap alternative to store bought scrapbooking flowers. They are made from recycled paper bags and pages from old books and magazines. They are a great addition for most paper crafts including, cards, invitations, scrapbooking and gift tags.

I used my final flower by gluing it to a bobby pin and placing it on a gift tag to add a little something extra to a present.

What you will need:
  • Recycled brown craft paper bag
  • A page or two from an old book or magazine (newspaper is too thin)
  • Scissors
  • Pencil
  • Paper Glue
  • Button
  • Teaspoon
  • Dish towel
  • Paper towels
  1. Download pansypattern.jpg and print it out full size (a scale has been placed on each jpg to help with printing at the correct proportions).

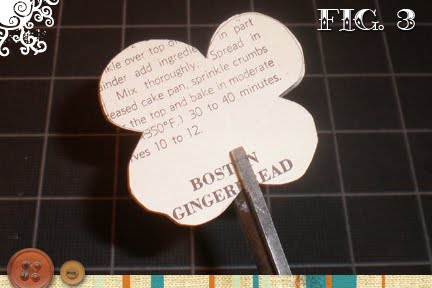
  2. Cut out each flower pattern. Using the large pansy flower pattern trace three flowers on the brown paper bag and book pages. Then take the small flower pattern and trace two small flowers on the book pages.


  3. Cut out all the flowers. Referring to the dotted lines on the original pattern, carefully cut each flower between its petals.


  4. Take a dish towel and fold it in half and place a paper towel on top. Placing the pansy cut outs on top of the paper towels and lightly moisten the front and back of of the paper flower.


  5. To get the slight curling and creasing in the flower petals, take your teaspoon and place the end on one of the moist flower petals. With moderate pressure press down and pull back the teaspoon stopping when you reach the middle of the flower.


  6. Repeat steps four and five with the remaining flower petals and let them dry completely.


  7. Starting with the larger flowers, glue them one on top of the other alternating paper colors. Use the two small flowers for the top of the flower. When gluing the flower layers make sure to rotate the positions so they are not all aligned.


  8. Take the spoon and place it on top of the glued flower and let it dry completely.


  9. Glue a button in the center to finish.

Comments

Post a Comment

Popular posts from this blog

Leather Earring Tutorial

Why should leather only be used for jackets, shoes and purses? Medium weight or upholstery leather is easy to craft since it doesn't fray or crinkle. These leather earrings are quick, versatile and easy to make. You can even recycle those old purses or jackets that have damage since you really only need small amounts of good leather. I used 4" square leather samples and had plenty left over to make more earrings. Supplies: Leather Leather punch (I bought mine at Michaels Craft store for around $10 but you can also get the from home stores like Home Depot or Lowes) Sharp scissors 2-Large Jump Rings 2-Earring wires Jewelry pliers Download the pattern below, print and cut out shapes. Cut 2-of each shape in the leather of your choice. I used 3 different types of leather, don't be afraid to mix it up. Pile one set of the three shapes on top of each other and carefully punch a whole on one of the ends. I punched the hole about a quarter of an inch away from the end using the sma

Leather Earring Pattern Update

In October I posted a tutorial to make leather earrings . Well for Christmas I revisited this craft and made a few other designs for a few people at my work. This is one of my favorite tutorials because they are so easy to make and the earrings are light and easy to wear. I liked the new designs so much I thought I would share the pattern for them. To view the full set of instructions on how to make these leather earrings, click here . To make one of the two pairs shown, download and print the updated pattern below (the bottom row are the new designs):

Washer Necklace Tutorial

Every time I buy furniture that requires assembly I always left over hardware. I take this hardware and put it in a jar thinking that one day I will need that extra nut or bolt. Well today is that day! Below is a tutorial on how to take those extra washers and make them into a cute necklace. Supplies: Scissors X-acto knife or hole punch Pencil Small piece of scrapbooking paper (you can use the left over scraps for this project) Modge Podge (or something similar) Washer Aleene’s Paper Glaze 36” of ribbon or cord Use the washer to trace a circle on the paper, don’t forget to trace the inside circle as well. Using your scissors cut just inside of the traced line on the outer circle. Note: you want to cut inside of the line and not on it so it fits on the washer and does not overlap the edges. If the hole for your center is close to the same size of a hole punch, simply punch out the center circle. If not use the X-acto knife to cut out the center area. Modge Podge the paper to the washer